Basic Steps To Building A Profitable E-commerce Website

Table of Contents
So you’ve always had this dream of building an e-commerce website, but have not turned it into a reality because of the same reason why most people have not done so too.
They don’t know how to get started, but they understand that they need at least some basic knowledge before hiring a website developer to build the e-commerce site or trying anything ambitious.
Well, this post tries to solve that problem by outlining 15 steps to build an e-commerce website. So whether you are building by yourself or hiring someone to help you, you’ll have all the knowledge you need to turn your e-commerce dream to reality at the end of this article.
If you’re ready, then let’s roll!
Jump to your favourite topic
- Here is a list of Steps To Building A Profitable E-Commerce Website in 2019.
- 1 1). Pick a Domain Name and Brand
- 2 2). Find the top 3 competitors and study their stores
- 3 3). Create your Categories and Subcategories List
- 4 4). Prepare a Product List
- 5 5). Define the pricing structure for your online store
- 6 6). Figure out shipping options
- 7 7). Finalize the Payment Gateways and Payment Methods
- 8 8). Prepare the Detail Feature List Document
- 9 9). Choose your eCommerce platform
- 10 10). Choose the right design and development partner
- 11 11). Build your eCommerce website
- 12 12). Set up your merchant account
- 13 13). Add an SSL certificate to your website
- 14 14). Make Online store launching plan
- 15 15). Prepare Digital Marketing Strategy and run on a daily basis
- 1 1). Pick a Domain Name and Brand
1. Pick a Domain Name and Brand
The first step to building your e-commerce website is searching for the domain that you want to use for it. Completing this search will help you confirm the availability of the domain and the cost of making it yours.

One thing to bear in mind, though, is that the name you choose for your domain has a significant impact on how much traffic you can send to your site directly and from search engines.
So keep the domain name short (so that customers can easily remember it) and related to the niche you want to join (so that you can rank for the right keywords in the long run). Domain names that fall within five-ten characters, plus the .com, .shop or what extension you choose can easily stick with your potential visitors.
When you’re done getting a domain for your site, you need to hire a professional graphics designer to do some basic branding stuff like the logo and other promotional materials. If you already have an offline brand that has a lot of audiences or at least substantial following, then there may be no need to create a new brand for your e-commerce website.
The site has a higher chance of performing better by existing as the online extension of your established brand. You will have less stress getting the first few visits to your site.

2. Find the top 3 competitors and study their stores
Unless you’re starting with a niche that no one has explored (there are very few if any), take ample time to go through the website of the top three e-commerce sites offering the same goods or services you intend to provide.

Once you have a list of three, visit the sites one after the other and pay particular attention to features like shop layout, cart functionality, loading speed, payment gateway and how easy it is to find items marketed by the store.
You can use site research tools like Ahrefs to find out more information about the competitors. For instance, you could learn about their primary source of traffic, (social or search), the location of their visitors and when traffic peaks on the site.
After gathering this information, spend some time to compare and find out which site you would like to replicate their efforts with a little more uniqueness.
What works for them can certainly work for you, but you can go a step further by finding out their shortcomings and improving on it. Do your best to make sure your site doesn’t come off as a mimic.
3.Create your Categories and Subcategories List
This is the stage where you logically organize the products on your store in a way that clients can easily find them.
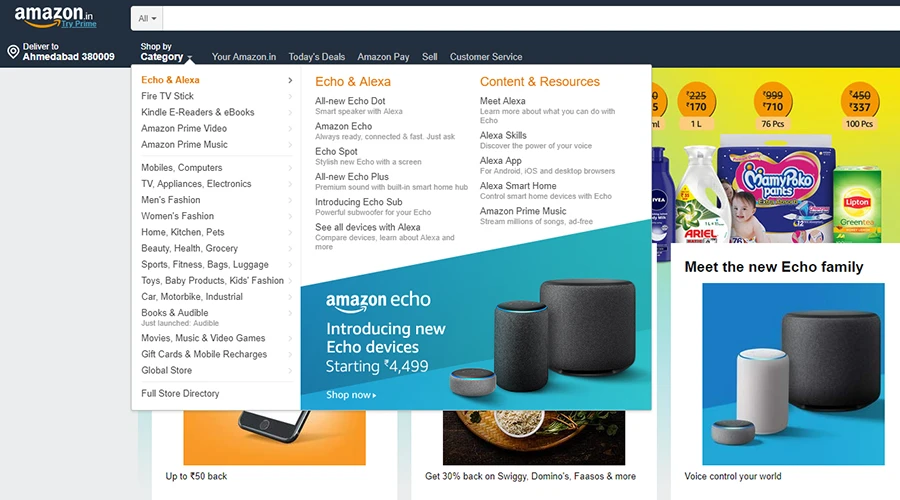
To do this, you can draw a category tree which includes all the major products you’re going to put on sale. For an electronics e-commerce website, your major categories can consist of Televisions, DVDs, Computers, Fans, Lightning and so on.
Under the subcategories, you can choose to break the tree down into the different brand of products in your store or classify then based on their size or prizes.
Using our electronics store examples, this will translate to having subcategories such as Samsung, LG, Huawei, Apple, Tecno and so on.
Remember your aim of creating categories and subcategories is to make it easier for visitors to find the products they want with a few clicks. If you take your time to bring every single product under their specific subcategory, then you have done half of the navigation job for your new e-commerce site!
Both shoppers who know what they want and those who don’t know will enjoy browsing through your inventory.
4. Prepare a Product List
Now that you have your categories and subcategories, it should be a lot easier to prepare a product list. A product list is like an inventory of every single product or service you want to put on sale.
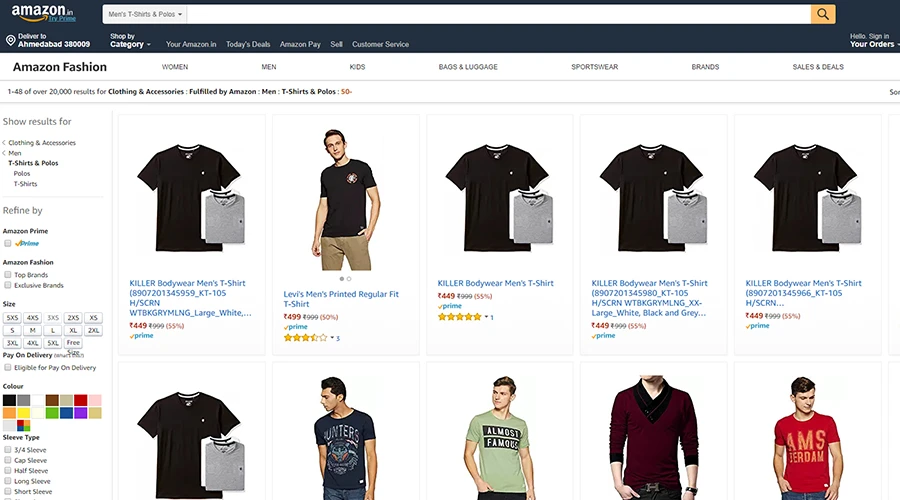
You can choose to write this down in the order of those you think will be frequently purchased by shoppers until the last item.
You may need to carry out an online or offline survey to find out what people are interested in buying so that you do not sell what you think people need when in the real sense they don’t need it.
If your running the online shop off an affiliate marketing giant like Amazon or Shopify and have nothing to do with the condition of or delivery of the products, then you can try to have as many items as you can on your list. Only take care to keep it uncluttered.
You can also get some inspiration on what needs to be on your product list from the earlier research that you carried out on your competitors.
In the end, there is no limit to the number of products you can offer on your e-commerce site, as long as you can manage the inventory and deliver to customers within a reasonable time after they placed an order.
5.Define the pricing structure for your online store
At this stage, you will outline how much you want shoppers to pay for the products they order from your site.
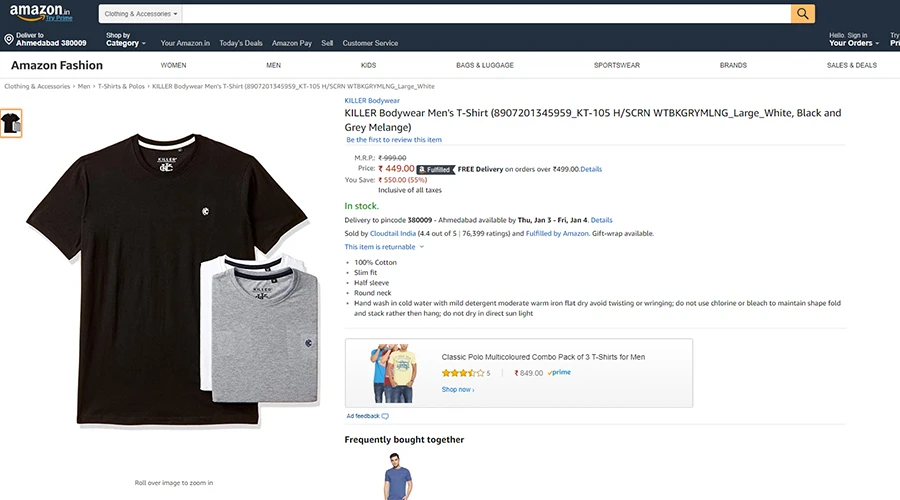
Will they order single items or be mandated to make bulk purchases?
For instance, you could choose to sell one unit of fashion bag for $200 or decide that shoppers must buy three units but a price of $500.
Will there be a discount on certain products?
Depending on your deal with the supplier of the products, providing a discount is a great incentive for attracting new customers and keeping old ones. However, do not give one at the detriment of your business capital.
What price tag should you put on your goods?
While it is recommended that you fix your price based on what works in the niche or industry, there is no harm in trying to sell slightly below or above what others are selling.
You can rack in more sales with little but constant profit if you sell lower and achieve lower sales with higher profits if you sell above the niche margin. So the choice is yours to make!
In conclusion, a defined pricing structure is where all your ROI is to come from, so what you make of it will likely decide how long you stay in business. Pick your product list and put a price tag on all the items you have on it and make changes to them as soon the price of the commodity increase or decrease.
6.Figure out shipping options
If you’re dealing with a physical product, then how to get it to the location of the consumer should be one of the things you sort out first.
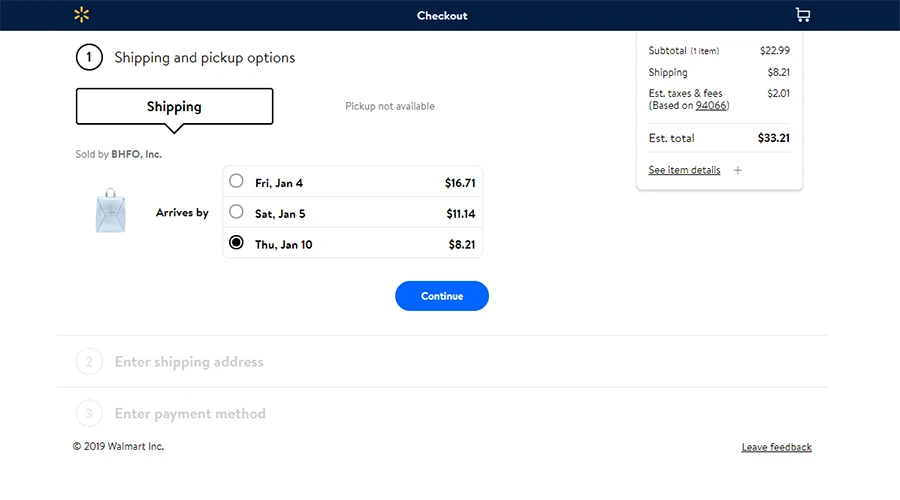
The common thing to do is to find a shipping company that operates within the geographic location of your shoppers and agrees on a fee with them to help you deliver the goods.
However, there are also other shipping options that you could consider, such as recruiting delivery agents if your business operates within a particular locale or setting up a single point in their location where shoppers can come and pick up their goods.
It is also at this point that you decide whether to offer a free delivery service to customers within a certain location who are buying a specific type of product.
You will also have to decide whether to add the delivery free to the actual price of the product or service they ordered, or simply let them pay for delivery depending on their location. Getting this right may allow you to add shipping costs as an extra revenue source for your e-commerce business.
Bear in mind that your priority with any shipping option or company you settle with should be to conveniently get your goods across to customers within the time they want it.

7.Finalize the Payment Gateways and Payment Methods
Payment gateways represent the channel through which you collect money from shoppers. The best gateway to integrate on your site is one that has a wide range of users and also a simple payment process that doesn’t confuse users.
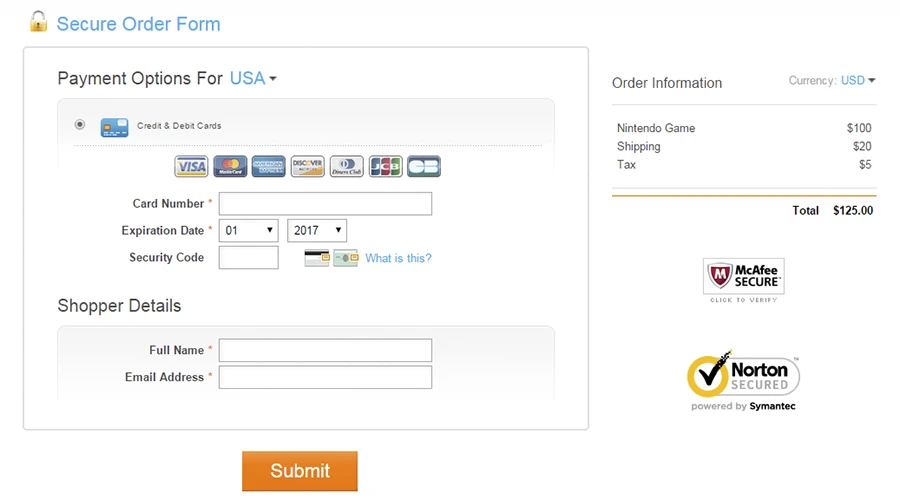
Most online stores use the PayPal payment integration to collect money since it is the most widely used monetary tool on the internet. PayPal supports payment in all major credit card Issuers like MasterCard and Visa and has active users in over 200 countries.
Related: Best Payment Gateways For E-Commerce Store
If you’re looking for something more innovative, then you can partner with cryptocurrency payment platforms to collect Bitcoin or any other digital currency on your site. However, there are risks attached to this form of payment collection so take time to study it before diving in.
You may also want to consider whether collecting cash payments on the delivery of the product or service will be ideal for your audience.
8. Prepare the Detail Feature List Document
The detail feature list document is the technical specification of what makes up your e-commerce website. Most e-commerce developers offer this as part of the web development deal, so you should have less problem with it.
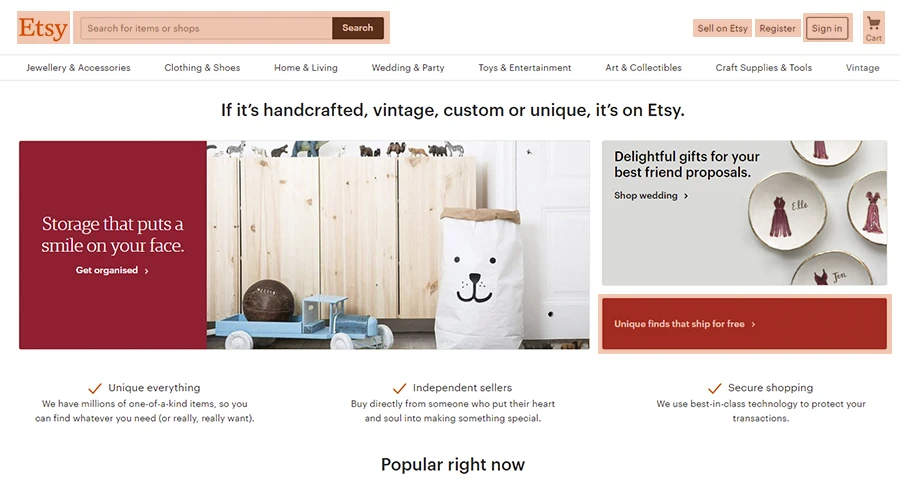
Some basic contents of a detail feature list document include API documentation from suppliers, legal compliance (PCI DSS) and security details about your site. This document also spells out the relationship between your site and analytics, stock management or affiliate systems that you use to power your store.
9. Choose your eCommerce platform
Probably, you already know that there are many e-commerce platforms that you can use to develop your site. Shopify, Opencart, Big Commerce, 3d Cart, Volusion, Big Cartel, and the list goes on.
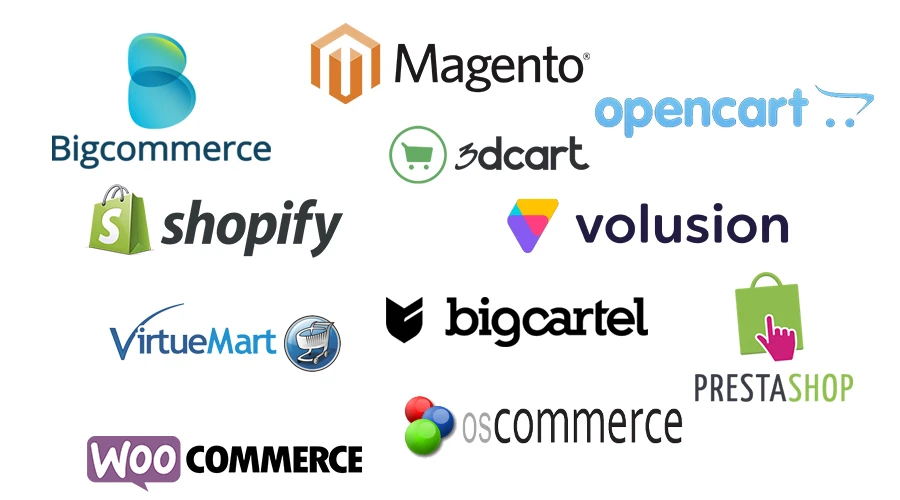
So it’s easy to get caught up with the numerous options that you don’t know which one to settle for. Well, here are the top features you must consider while choosing an e-commerce platform
- SEO friendliness
- Security
- Payment gateways accepted
- Convenience
- Integrations and plugins
- Mobile Friendliness
- Customer Service
In the case of e-commerce development, it is often required that you settle for what works for many people already. So you can look up which of the platforms listed earlier has the most users and join the queue.
Once you’ve chosen an e-commerce platform, you’ve completed more than half of the job required. You can now host the domain that you chose earlier with a top hosting company like Hostgator.
10. Choose the right design and development partner
While it’s pretty easy to assume that you can handle all the stuff required in setting up your e-commerce site, the truth is that you will need a development partner if you’re going to come out with a perfect result. Two heads are always better than one.

So, who can you choose as a design and development partner?
Our top pick is someone who has experience in e-commerce development and at least has worked on similar projects. They will help you identify key cogs that you must add to your site to make it profitable from the start.
If you can’t find someone who falls into this category, then you can pick someone who is as passionate as you are about getting the site up. You both can carry out extensive research and prescribe ideal solutions that will ease the workload on the professional web developer that you hired for the project.
Wait! It’s highly important that you hire a developer who has a lot of experience or at least some experience in building an e-commerce site, that is if you don’t want your site to come off as an experiment.
Then, if you’re running a company already, then you can consider letting everyone at your office make an input on what they expect to see on your site.
11.Build your eCommerce website
Now that you have crossed all the T and dotted the I’s, you’re ready to build your e-commerce website.

One of the first choices you have to make at this stage is whether to have your developer build the site from scratch using codes or whether you’ll use an e-commerce site builder provided by your hosting company or platform.
Related: Things To Consider When Designing An ECommerce Website
Site builders make development a lot faster while coding from scratch gives you more control, so you can choose which one works best for you.
The next set of work is to write copies that describe the products or services your offering on the site. You can also decide to add an element of persuasion to the copy to increase the chances of shoppers buying from you.
You will at this stage also writing content for –
Homepage – Basic information about your site including the products weekly deals and other promotions
About Us page – detailed information about what your brand and who you are.
Privacy Policy – defines how you manage data collected from users. You can use a free privacy policy generator for this purpose, but take time to compare it with what is available on other sites.
Contact Us Page – All the channels through which customers can get in touch with your business to resolve their issues.
Blog Page – Where you post latest industry news, ongoing promotions and helpful tip for shoppers.
Blending these pages with a carefully selected e-commerce theme provided by your site builder or web developer will ensure that your site comes off as perfect as you want it.
12.Set up your merchant account
We earlier talked about choosing a payment gateway, so it is after you’ve developed your website that you integrate the payment gateway you choose earlier by signing up for a merchant account with them an linking it to your site.

A merchant account is what the payment system like PayPal will use to store money collected from your visitors. It may require that you pay some small money for setting up the account or even having them hold your funds for some time, but the bills are not so much that you can’t afford it.
You can’t exchange it for the stress of collecting funds manually, so setting up a merchant account is a good deal.
13. Add an SSL certificate to your website
An SSL certificate adds an extra layer of security to your website by ensuring that essential data such as credit card details shared by visitors cannot be hacked by an intruder.

If your site doesn’t have an SSL site, then there’s little to no chance that users will feel free to surf through your inventory, talk more about completing a purchase. So make sure the web developer you’re working with adds an SSL certificate to your site to complete the setup process.
Hosting companies such as Hostgator offers you a free SSL certificate once you pay for a plan on their service. So you can count on this feature to get a free SSL certificate or buy from somewhere else for $10 or more.
14. Make Online store launching plan
Now that you’ve spent all that money and time to setup up your e-commerce website, you want to take in as many sales as possible within your first few months in business and forever of course.

That is where making an online store launching plan comes to play. It has to do with more than setting a date on which your site will officially be open for business and fixing any remaining issues with your new site.
You have to come up with mouthwatering incentives that will make people leave your competitors to patronize you – an excellent place to start with maybe offering free delivery or bonuses to items sold on your launch date.
These promotions do not have to eat deep into your pocket if you can come up with a strategic offer for your shipping company or product suppliers.
Design flyers about your proposed launch date and have your family, friends and anyone on your team share it to as many people as possible via social media or offline.
Lastly, offer full value to customers as soon as they get on your site, that is the only way to keep them. Let them the best value for whatever product or service they pay for and ensure that these goods are delivered promptly and even earlier than they expect it.
15. Prepare Digital Marketing Strategy and run on a daily basis
In case you haven’t heard, e-commerce relies heavily on digital marketing to be successful, so getting your strategy right can be the difference between how much profit or loss you make.

Here are the basic digital marketing service you need, though it mostly depends on your budget,
- SEO (Search engine optimization) experts
- SEM (Search engine marketing) experts
- Affiliate Marketing System developers
- Email marketing experts
- Social Media Managers
Most digital marketing firms offer all these services as a single package that you can pay for monthly or based on any other terms you can agree on. However, bear in mind that your digital marketing efforts must bring your brand closer to users and give them added reasons to shop with you each time they have a need.
Keep running your store on a daily basis and do not give up if the sales do not seem to pour in within the opening weeks or even months. Sometimes it takes a little while for an e-commerce website to start making a consistent income, but when it does happen, you will reap the benefits.
Final Words
Now you have the basic knowledge of what is involved in building an eCommerce website; there should be nothing holding you back.
Go ahead and turn that dream of yours into a reality that can put money in your pocket. You are likely to enjoy every bit of the experience!

